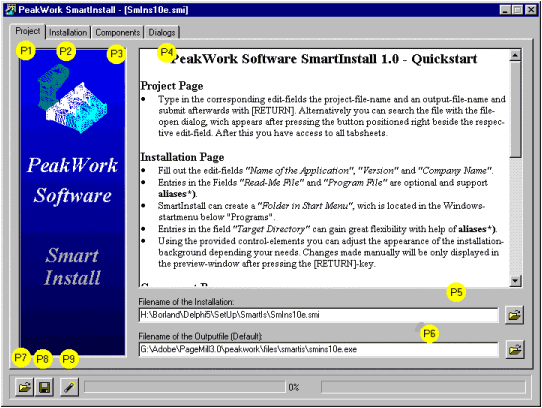
The following figure shows an example of the Project Page after the project file has been identified. The features labelled with yellow circles (P1 to P9) are described below. The Installation tab (P2), the Components tab (P3), and the Dialog tab (P4) are not shown until the project file has been identified.

SmartInstall allows all of the information specified in the following pages to be managed through a single installation project file. The name of this installation project file and the name of the folder in which it is located serve as the default values for certain options specified in the subsequent pages. Consquently, SmartInstall does not allow access to the subsequent pages until a valid installation project file has been identified on this page.
This page also allows one to specify a default name for the output installation file to be generated based on the information in the installation project file. This name is suggested when you are about to generate the installation file and you must specify the actual output file name.
Until either (a) an existing installation project is chosen, or (b) a new installation project is created, nothing else can be done. Additional information on how to select an existing project or create a new project is provided in the following step-by-step guide.
Return to The Project Page (top).To open an existing installation project or to create a new installation project:
All additional tabs (P2, P3, and P4) will become visible after the name of the installation project file has been specified. SmartInstall will then automatically bring you on the Installation Page.
Continue with The Installation Page (top).Last modified: April 15, 2000